In the second design we are following the topology as below
![](https://engineeronnetwork.wordpress.com/wp-content/uploads/2021/08/image.png?w=1024)
wherein we will be using the distributed switch on one workload domain which is on vcenter and nsxhostswitch will be used on the physical ESXi and we will do the various test and deployments Support for VDS is included only on the latest version of NSX-T and not with the older versions
Lets create the Distributed switch first as in the screens below
![](https://engineeronnetwork.wordpress.com/wp-content/uploads/2021/08/image-1.png?w=808)
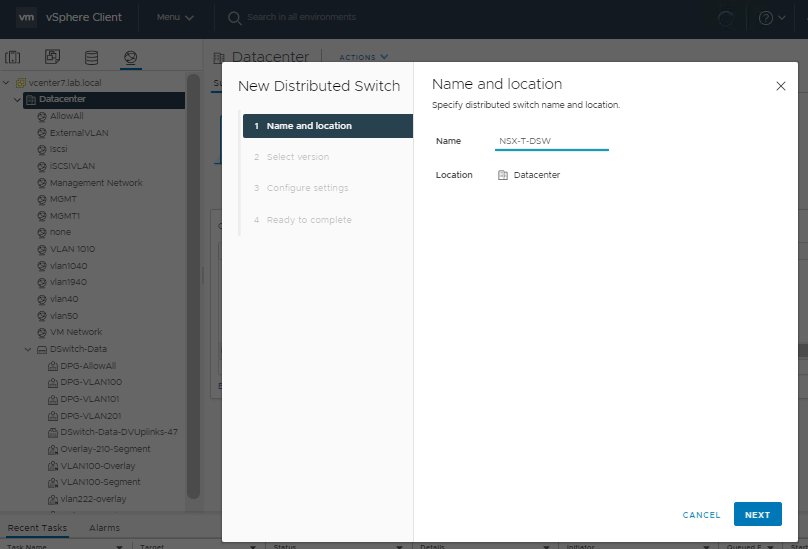
The steps are self explanatory, what i’m doing is just creating the VDS
![](https://engineeronnetwork.wordpress.com/wp-content/uploads/2021/08/image-2.png?w=847)
![](https://engineeronnetwork.wordpress.com/wp-content/uploads/2021/08/image-3.png?w=806)
![](https://engineeronnetwork.wordpress.com/wp-content/uploads/2021/08/image-4.png?w=802)
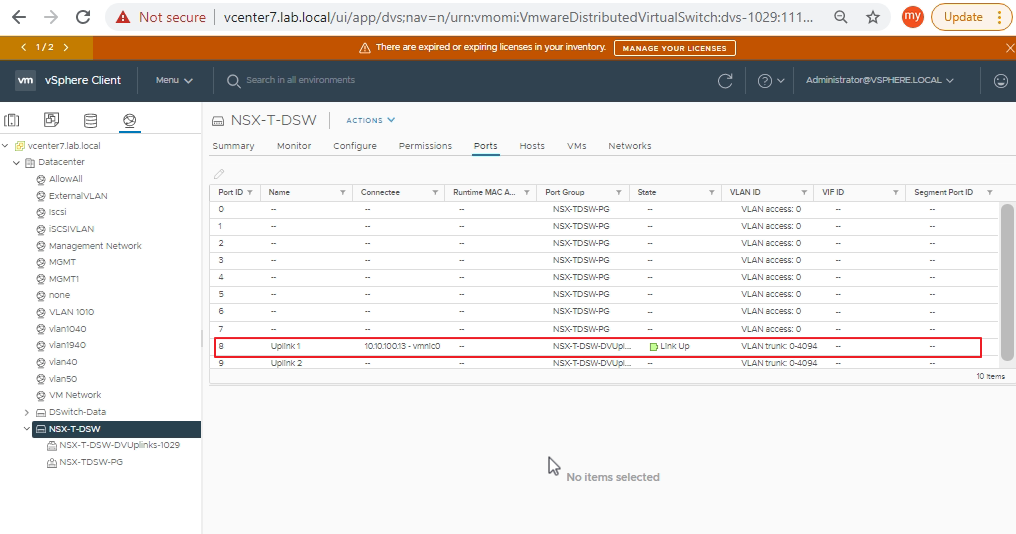
The below settings shows the distributed port-group settings which got created
![](https://engineeronnetwork.wordpress.com/wp-content/uploads/2021/08/image-5.png?w=913)
![](https://engineeronnetwork.wordpress.com/wp-content/uploads/2021/08/image-6.png?w=917)
And above you can see the uplink creation wherein all the VLANs are allowed by default
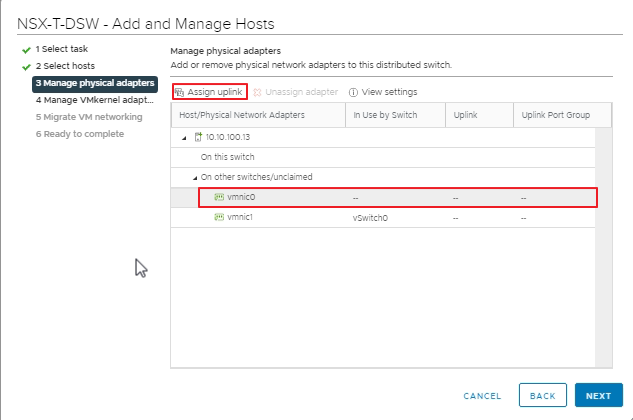
Now we need to map the interfaces with the distributed switch lets do that
So as per our topology we will map our host 10.10.100.13 vmnic0 to the distributed switch
To do that follow the below steps
![](https://engineeronnetwork.wordpress.com/wp-content/uploads/2021/08/image-7.png?w=246)
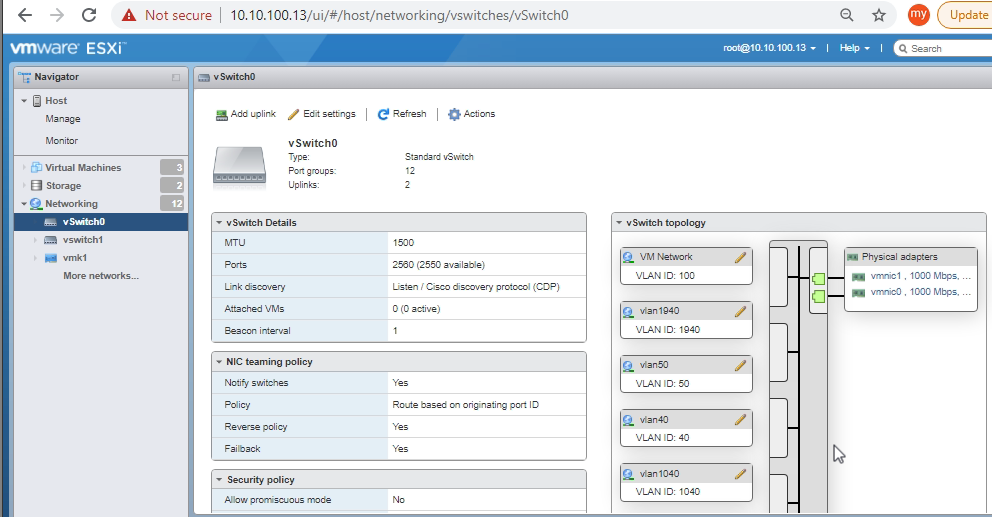
I dont want to loose the connectivity while doing the change so i checked where the vmkernel NICs are mapped and i could see that it is mapped with the vlan and vswitch0 and both the vmnic0 and vmnic1 is mapped to the same vswitch0 so i can remove vmnic0 from that vswitch safely without dropping the connection to the ESXI
![](https://engineeronnetwork.wordpress.com/wp-content/uploads/2021/08/image-8.png?w=992)
![](https://engineeronnetwork.wordpress.com/wp-content/uploads/2021/08/image-9.png?w=819)
![](https://engineeronnetwork.wordpress.com/wp-content/uploads/2021/08/image-10.png?w=987)
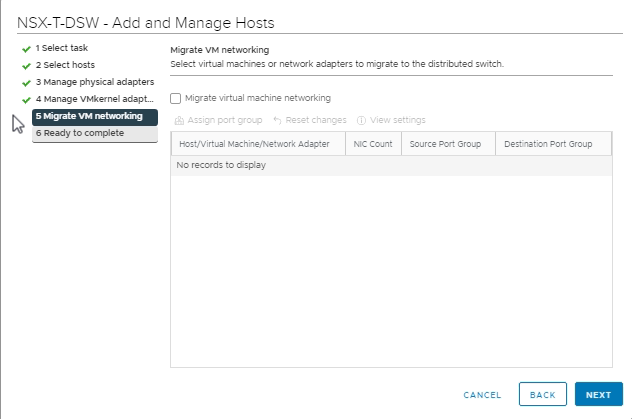
The below steps shows how to add the host to the distributed switch
![](https://engineeronnetwork.wordpress.com/wp-content/uploads/2021/08/image-7.png?w=246)
![](https://engineeronnetwork.wordpress.com/wp-content/uploads/2021/08/image-11.png?w=832)
![](https://engineeronnetwork.wordpress.com/wp-content/uploads/2021/08/image-17.png?w=637)
![](https://engineeronnetwork.wordpress.com/wp-content/uploads/2021/08/image-19.png?w=582)
![](https://engineeronnetwork.wordpress.com/wp-content/uploads/2021/08/image-20.png?w=633)
![](https://engineeronnetwork.wordpress.com/wp-content/uploads/2021/08/image-21.png?w=626)
![](https://engineeronnetwork.wordpress.com/wp-content/uploads/2021/08/image-22.png?w=627)
So here am not assigning any VMKnics as it is already attached to the vmnic1 and the standard switch
![](https://engineeronnetwork.wordpress.com/wp-content/uploads/2021/08/image-23.png?w=632)
![](https://engineeronnetwork.wordpress.com/wp-content/uploads/2021/08/image-24.png?w=626)
So we have completed the addition of this distribution switch to the host, so verified the same on the ESXi host as below
![](https://engineeronnetwork.wordpress.com/wp-content/uploads/2021/08/image-25.png?w=1001)
Same i can see on the vcenter as well
![](https://engineeronnetwork.wordpress.com/wp-content/uploads/2021/08/image-26.png?w=1016)
i dont want to make this session lengthy so i will go through the next post on the NSX-T with the distributed switch
well explained bro. appreciated